
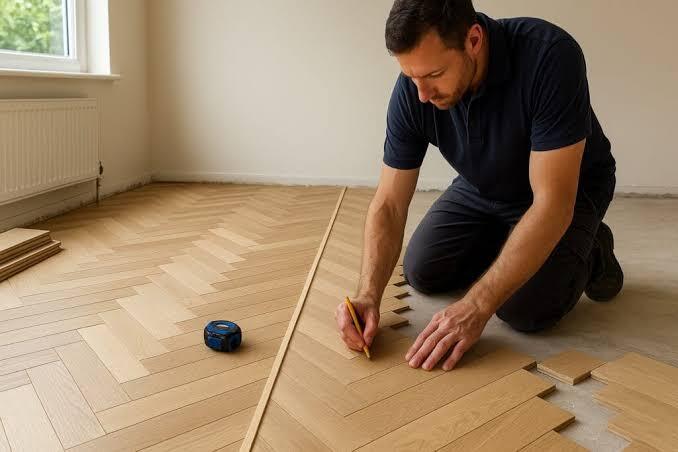
Herringbone flooring is one of the most elegant and recognisable choices for homes, offices and commercial interiors. Its distinctive zigzag pattern adds depth, movement and craftsmanship to a space, creating a floor that feels both timeless and refined. Installed correctly, herringbone flooring can enhance the value, character and durability of a property.
However, this pattern is far less forgiving than standard plank flooring. Every piece must be measured, cut, aligned and secured with accuracy, and even a small mistake can interrupt the visual rhythm of the floor, creating gaps, uneven angles or a pattern that looks subtly off. This is why professional installation is essential – the result depends not only on the quality of the wood, but also on the preparation, layout, fitting and finishing behind it.
Poor Subfloor Preparation
One of the most common reasons herringbone floors fail is poor subfloor preparation. The subfloor must be clean, dry, level and structurally sound before any wood is installed. If the surface underneath is uneven, weak or contaminated with dust, debris or old adhesive, the individual pieces may not sit or bond correctly.
Because herringbone flooring relies on repeated angles and close alignment, problems beneath the surface quickly become visible above it. An uneven subfloor can lead to lifting, gaps, movement or an inconsistent pattern – and these issues often become more noticeable as the floor reacts to foot traffic, temperature changes and daily use.
A professional installation should always begin with a full subfloor inspection. Any gaps, moisture issues, damaged sections or uneven areas should be corrected before the pattern is laid.
Ignoring Moisture Levels
Wood is a natural material that expands and contracts with moisture and humidity. If the subfloor is too damp, or if the wood has not been properly acclimatised to the room, the floor may warp, buckle or shift after installation. This is especially damaging for herringbone floors, because the pattern depends on tight, consistent placement – if individual blocks or planks move, the clean zigzag design can become distorted.
Moisture testing is therefore a critical step before installation begins. It confirms that the subfloor is suitable for wood flooring and reduces the risk of future movement, swelling or failure. Skipping this stage may save time at the start, but often leads to expensive problems later.
Weak Layout Planning
A herringbone floor should never be installed without careful layout planning. The pattern must be centred, balanced and measured according to the shape and size of the room. If the starting line is incorrect, the entire floor can drift out of alignment.
Poor planning can result in awkward cuts around the walls, uneven borders, misaligned focal points or a pattern that feels visually unbalanced. These mistakes are particularly noticeable in hallways, open-plan spaces and rooms with strong sightlines. Professional installers carefully mark the layout before fitting begins, ensuring the pattern flows naturally through the space and remains consistent from one side of the room to the other.
Inaccurate Cutting of Wood Pieces
The beauty of herringbone flooring depends on precision. Each piece must be cut to the correct size and angle to fit neatly into the pattern. If even a few pieces are slightly inaccurate, gaps can appear and the geometry of the design can lose its sharpness.
Poor cutting is especially visible around corners, doorways, wall edges and transitions between rooms – areas that demand skill, because the pattern must remain clean while adapting to the shape of the space. Accurate cutting also reduces waste and ensures the floor looks professionally finished.
Skipping the Dry Lay Stage
Dry laying is one of the most important steps in the herringbone installation process. Before adhesive is applied, the pieces are positioned without being fixed permanently, allowing the installer to check the pattern, confirm the fit and make adjustments before the floor is secured.
Skipping this stage can create serious problems. Once adhesive has been applied, there is limited time to correct errors. If the pattern is unbalanced or the pieces do not fit correctly, fixing the issue can be difficult and disruptive. A dry lay gives the installer a clear preview of the finished floor and helps prevent avoidable mistakes.
Using the Wrong Adhesive
A herringbone floor needs a strong and stable bond. Using the wrong adhesive, applying too little or spreading it unevenly can cause individual pieces to move, lift or create hollow spots beneath the surface.
Because herringbone flooring is made up of many smaller sections, secure adhesion is essential – if one piece shifts, it can affect the surrounding pattern and weaken the overall finish. A high-quality adhesive designed for wood flooring should be selected according to the floor type, subfloor condition and installation requirements.
Rushing Placement and Alignment
The most visible herringbone failures usually come from poor placement and alignment. The pattern should look sharp, consistent and intentional. If pieces are fitted too quickly or without regular checks, the alignment may drift, creating a floor that looks uneven even when the material itself is high quality.
A successful herringbone installation requires patience, measurement and constant attention to detail. Each piece should be placed carefully, pressed securely and checked against the planned layout – the kind of precision that gives herringbone flooring its high-end appearance.
Poor Sanding, Buffing and Sealing
Installation does not end once the wood is fitted. The finishing process plays a major role in how the floor looks and performs. Sanding creates a smooth, even surface; buffing enhances the natural appearance of the wood; and sealing helps protect against moisture, stains and everyday wear.
If sanding is uneven, buffing is skipped or the sealant is applied poorly, the floor may look patchy or become vulnerable to damage. The finish also defines the final style of the room, whether the preferred look is matte, satin or gloss. A properly finished herringbone floor should look balanced, smooth and natural while remaining protected for long-term use.
Why Professional Herringbone Installation Matters
Herringbone flooring can add elegance, durability and long-term value to a property – but only when every stage is handled correctly. The cost of installation depends on several factors, including the wood type, room size, subfloor condition, pattern complexity and chosen finish.
FloorOx provides professional herringbone floor installation with careful attention to subfloor preparation, layout planning, cutting, dry laying, adhesive application, sanding, buffing and sealing. This structured approach ensures the pattern is accurate, the finish is durable and the floor suits the style and use of the space.
Precision Is the Difference Between Failure and a Flawless Finish
Herringbone floors fail when preparation is rushed, moisture is ignored, measurements are inaccurate or the pattern is not carefully aligned. Because the design is so detailed, small mistakes can have a major impact on the result.
For property owners who want a refined, durable and visually balanced floor, FloorOx provides specialist herringbone installation expertise designed to protect the pattern, enhance the finish and deliver long-lasting results.